Roles Management
Usage
You may create and change your CRMdesk system user roles. Every role defines the actions a user is allowed to perform with different objects (knowledge base records, questions, customers and reports).
When a user is handling an object, he or she only sees action buttons corresponding to the permissions specified in the role assigned to him or her. Thus, for example, if a user’s role does not include the permission to delete questions, there will be no Delete button on the screen when this user accesses a question.

Path
Setup tab – Workflow - Roles
Procedure
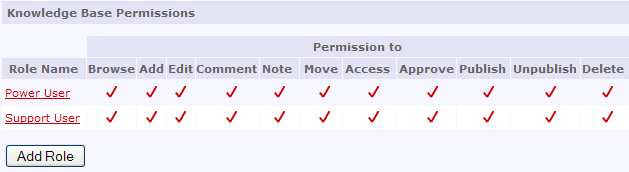
Initially, your CRMdesk system has only one predefined role: Power User. To make the system better suit your support team’s functional pattern, you can add an unlimited number of roles and rename/change existing ones.
For convenience, the Roles management page is separated into four areas: three areas for access permissions categories and one for “Questions” tab layout. To change an existing role, click on its title in any role list. To create a new one, click any of the Add Role buttons. The role details page will be displayed.
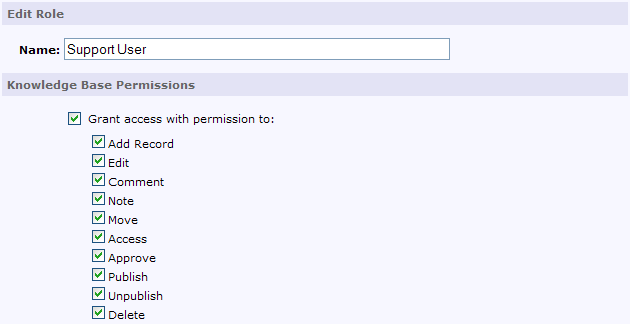
A. Maintain Knowledge Base permissions
Check the actions you want the role to authorize:
- Grant access with permission to – accessing the FAQs tab (shows/hides the tab);
- Add – creating new Knowledge Base records;
- Comment – adding comments to Knowledge Base records;
- Approve – approving Knowledge Base comments;
- Publish – publishing Knowledge Base comments;
- Unpublish –unpublishing Knowledge Base comments;
- Delete – permanently deleting Knowledge Base records;
B. Maintain questions permissions
Check the actions you want the role to authorize:
- Grant access with permission to – accessing the Questions tab (shows/hides the tab);
- Open – creating new questions;
- Reply – posting replies to questions;
- Note – adding notes to questions;
- Edit – changing question headings;
- Move – moving questions to another Product/Area;
- Reassign – reassigning questions to another user;
- Close – marking questions as closed (resolved);
- Link – linking questions with each other;
- Delete – permanently deleting questions;
- BUGtrack – ability to create BUGtrack records (Create BUGtrack Record button).
C. Maintain the “Questions” tab layout
Applicable only when the “Questions” tab is active for the role. When a user accesses the Questions tab in the Support Desk, a quick access page appears. It may contain groupings of questions by different attributes, including any of your custom fields. For example, the Opened by group contains customer names. Each customer name is hyperlinked to all the questions this customer has opened.
For each role, choose the grouping attributes in the combobox fields of the role details page.
D. Maintain customers permissions
Check the actions you want the role to authorize:
- Grant access with permission to – accessing the Customers tab (shows/hides the tab);
- Access – viewing the details of customer accounts;
- Merge – merging customers;
- Delete – deleting customer accounts permanently;
- Send News – sending mass e-mails to customers;
D. Maintain Reports tab access
Check the Grant Access field if you want to grant the report execution rights.
To save your changes, click the Submit button.
Tips
Create as many roles as you need and review the role model once in a while to make sure users have enough authorization and their areas of responsibility do not overlap.